
What is the resolution
Stimulated Emission Depletion (STED) microscopy is a cornerstone of superresolution imaging, enabling researchers to visualize structures at the nanoscale by overcoming the diffraction limit of light. Unlike conventional confocal microscopy, which is limited to a lateral resolution of about 200 nm, STED can achieve resolutions down to 20 nm – and even beyond – by exploiting the physics of stimulated emission to spatially confine fluorescence. While this requires some effort, e.g., using optimized dyes, a medium resolution increase in the range of 50-100 nm can readily be achieved with standard protocols.
of a STED microscope?
Fundamentals of STED resolution
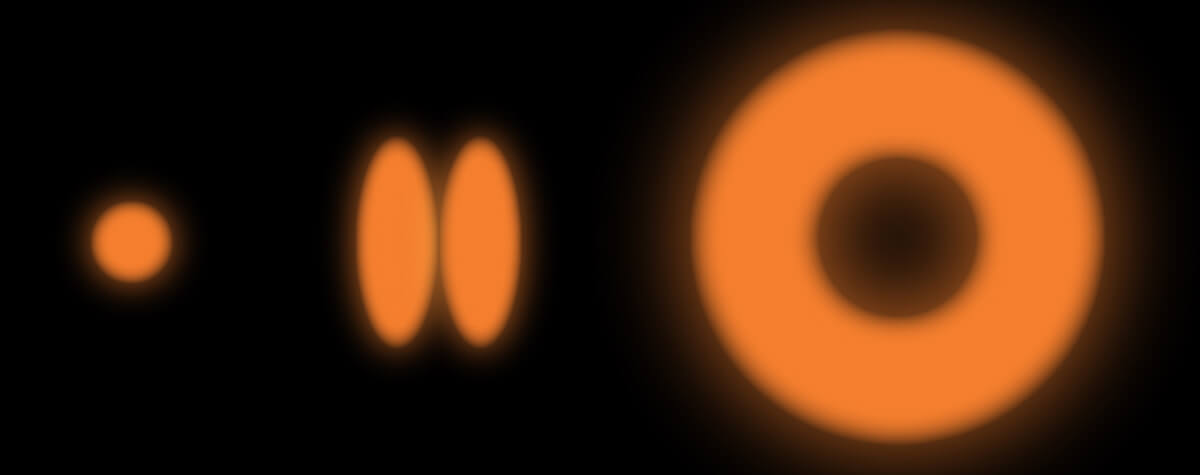
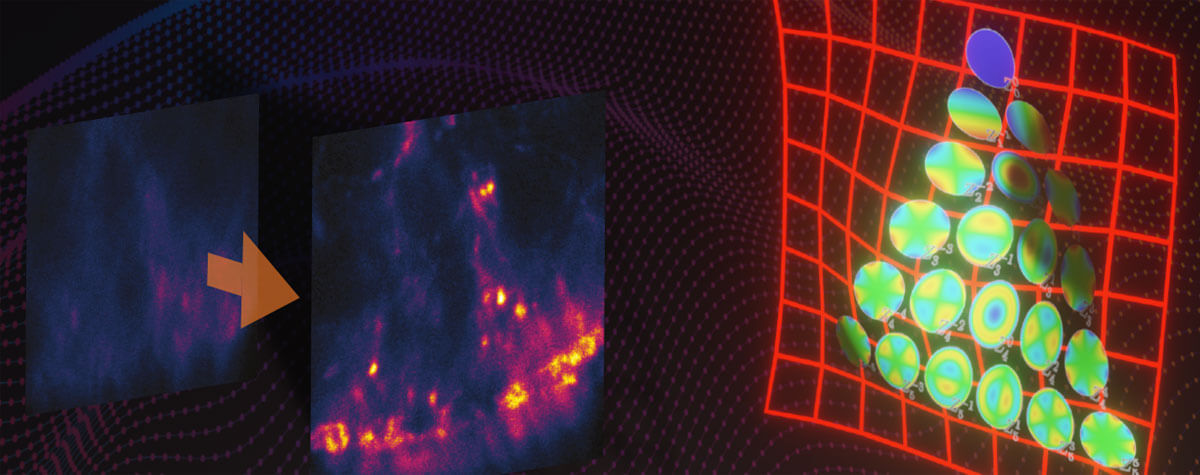
At the heart of STED microscopy lies the concept of temporarily switching-off fluorescence at the perimeter of the excitation spot using a second, donut-shaped laser beam (here is how to make a STED donut). This beam forces excited molecules back to the ground state without fluorescence, except at the very center of the donut where the intensity is zero. It is only there that the fluorophores are allowed to fluoresce. The result is a much smaller effective point spread function (PSF) (what’s this?), and thus, higher resolution. You can read more about how STED works here.

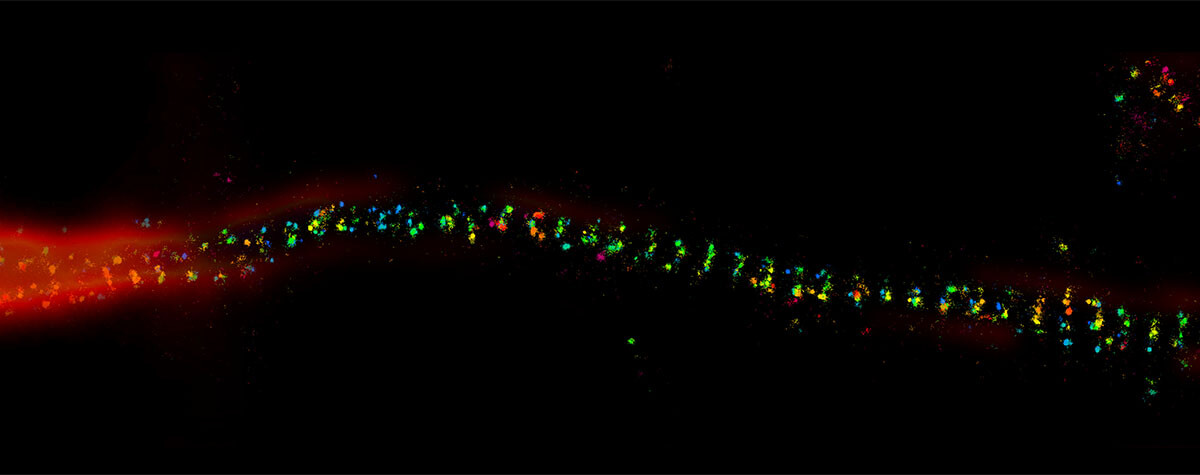
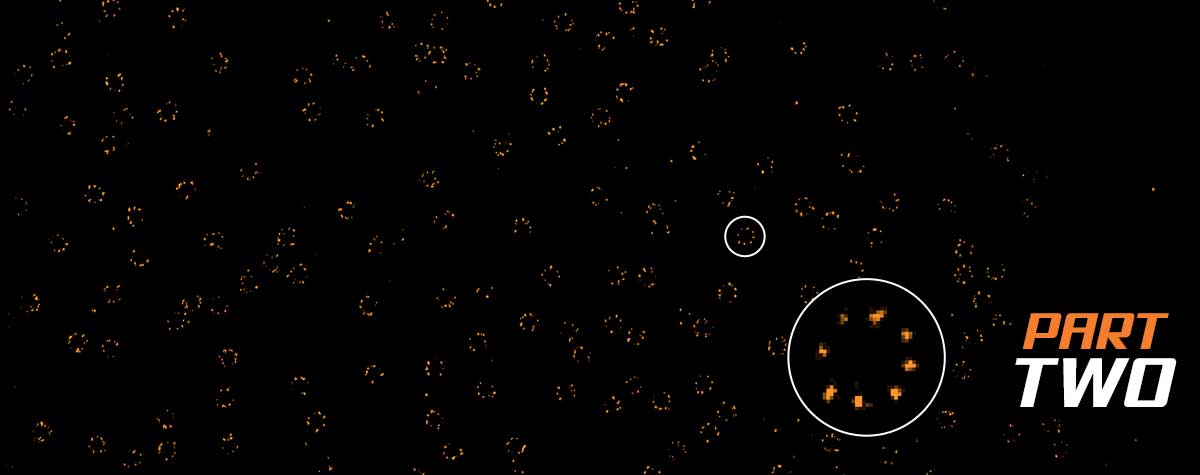
A STED laser constricts the area of allowed fluorophore emission to about 20 nm, bringing resolution into the sub-diffraction range. Stefan Hell’s groundbreaking invention established the field of superresolution microscopy.
The resolution R in STED microscopy can be approximated by the formula
\(\textit{R}\approx \frac{\lambda}{2NA} \frac{1}{\sqrt{1+\frac{I}{I_{SAT}}}} \)
where
- λ is the wavelength of the depletion laser,
- NA is the numerical aperture of the objective,
- I is the STED laser intensity,
- ISAT is the saturation intensity of the fluorophore, characteristic to each dye.
The roles of dye and laser
This equation highlights two critical factors: the STED laser intensity and the properties of the fluorescent molecules.
When the STED laser intensity is zero, the square root amounts to one and the resolution is just that of a diffraction-limited microscope ( \(\frac{\lambda}{2NA} \) ). When I is much higher than the saturation intensity ISAT , the value of the square root is large and the resolution R can become infinitely small in theory.
So, among other things, resolution hinges on how much larger the STED intensity can become compared to the saturation intensity of the dye. Preferably, one uses dyes with a small ISAT to maximize the resolution while keeping STED intensities low.
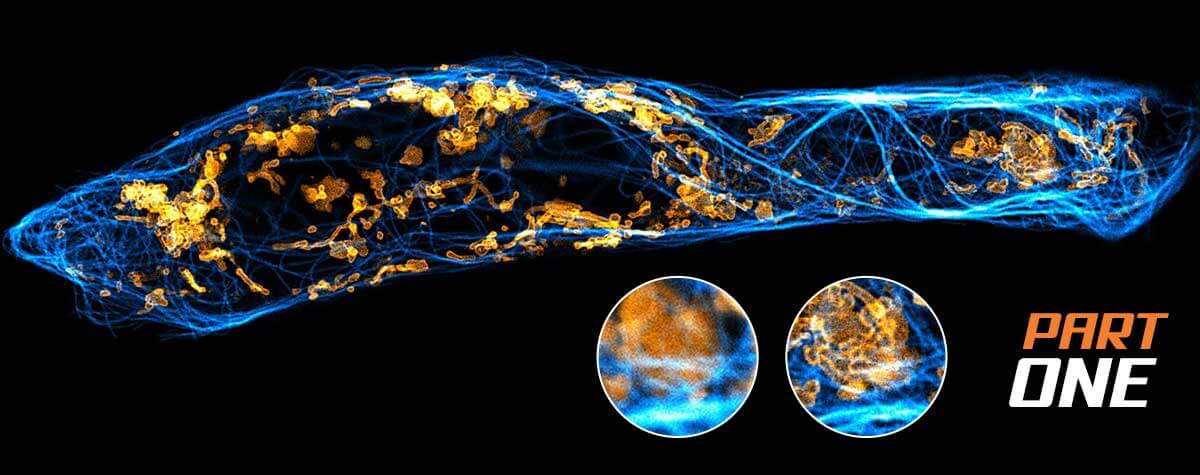
You see, the choice of fluorescent dye is pivotal. While STED-optimized dyes like abberior STAR RED offer exceptional performance, many commonly used dyes such as Alexa Fluor 488, Alexa Fluor 532, and even fluorescent proteins like GFP or YFP can also yield substantial resolution improvements. These dyes are widely used in standard immunofluorescence protocols and at the same time are compatible with STED systems equipped with standard depletion lasers (e.g., 592 nm or 775 nm).
For these general-purpose dyes, STED microscopy can still achieve lateral resolutions in the 50-100 nm range, making it a powerful upgrade to conventional imaging without requiring any changes to labeling protocols.
For any given dye, increasing the STED laser intensity enhances resolution by more effectively shutting of peripheral fluorescence. However, this comes with trade-offs:
- Photobleaching: Higher intensities can degrade some fluorophores faster.
- Phototoxicity: Live-cell imaging becomes more challenging.
- Re-excitation: At high STED intensities, especially with certain dyes, the depletion beam can inadvertently re-excite fluorophores, leading to background fluorescence and reduced image contrast.
- Signal-to-noise ratio: STED removes low-resolution photons in the focal plane, but not outside of it. If the sample has high background fluorescence – such as from out-of-focus regions or autofluorescence – this background can overwhelm the desired high-resolution signal, reducing image clarity.
Thus, optimizing laser power is a balancing act between resolution, signal, and sample preservation.
Going beyond: strategies for ultra-high resolution
To push resolution below 50 nm, several advanced strategies can be employed:
Use of STED-optimized dyes
Dyes like abberior STAR RED are engineered for high photostability, low re-excitation, and efficient depletion (small ISAT). These dyes tolerate higher STED intensities and enable resolutions down to 30 nm or better. Importantly, labeling procedures remain unchanged, allowing seamless integration into existing workflows.
Adaptive illumination techniques
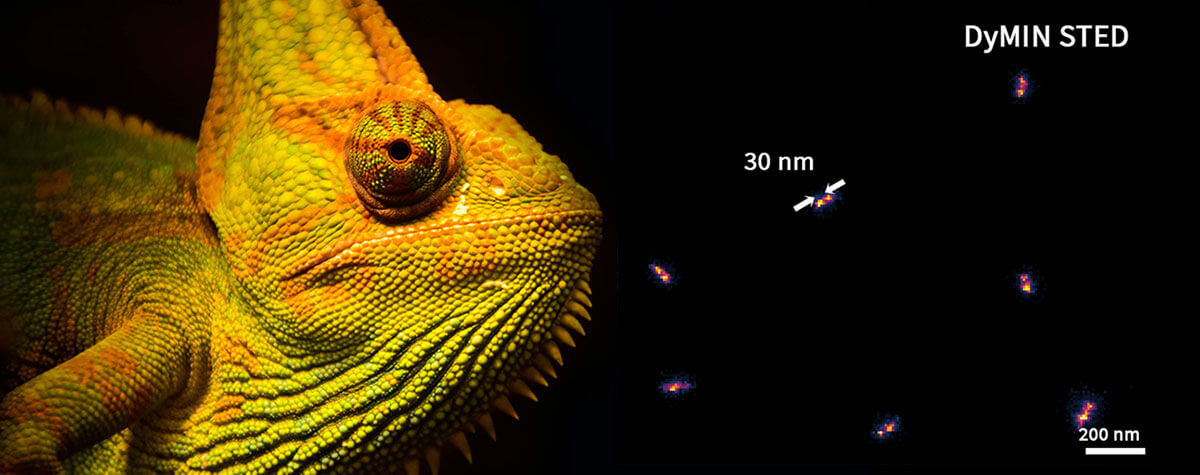
Adaptive methods such as RESCUE or DYMIN dynamically modulate the STED beam based on local fluorophore density. This reduces unnecessary photobleaching, phototoxicity, and enhances signal and resolution, especially in sparse regions. These techniques are highly useful for live-cell imaging, when targeting delicate structures, or for pushing STED resolution to 20 nm and below. Read more about adaptive illumination here.
FLIM-STED
Fluorescence lifetime imaging or FLIM, such as abberior’s TIMEBOW, leverages differences in fluorescence lifetimes to distinguish between fluorophores or to enhance contrast. It can also improve STED resolution by refining the spatial localization of emission events. This is because the donut-shaped STED beam shortens the fluorophores’ lifetime in a spatially dependent way and this spatial modulation of lifetime encodes positional information, allowing FLIM-STED to extract finer details.
Array detection and background removal
Technologies like abberior’s MATRIX detector use spatially resolved array detection to distinguish in-focus signal from out-of-focus background. This allows for physical measurement and removal of background, significantly improving contrast and effective resolution, especially in thick or autofluorescent samples.
Always a good idea: post-acquisition enhancement with deconvolution
For best results it’s always preferable to provide perfect physical conditions, i.e., to optimize sample, dye, and microscope. Regardless of the imaging conditions, however, deconvolution remains a powerful post-acquisition tool to further enhance resolution. Algorithms like abberior’s TRUESHARP use knowledge of the system’s PSF to sharpen images, remove background, and reveal fine structural details that may be obscured in raw data. Deconvolution can be applied to both confocal and STED datasets, making it a universally beneficial step.
Conclusion
STED microscopy offers a flexible and scalable approach to superresolution imaging. While resolution is fundamentally governed by the interplay between dye properties and STED laser intensity, significant improvements can be achieved even with widely used dyes like Alexa Fluor 488 or GFP. For researchers seeking even higher resolution, options include switching to STED-optimized dyes, employing adaptive illumination, or integrating FLIM. In all cases, post-processing with deconvolution tools like TRUESHARP can further refine image quality. Together, these strategies make STED a versatile platform for exploring the nanoscale architecture of biological systems.