

Optical sectioning
The development of confocal microscopy was a crucial step for biological imaging. Almost everyone who has used a confocal microscope will agree that it produces better images than an ordinary epi-fluorescence wide-field microscope. As to why, opinions differ. Is it because of the higher resolution? More sensitive detectors? Pinpoint illumination with laser light? Some might say optical sectioning, but what is that exactly? And what does an array-based detector like the MATRIX do differently to achieve superior background subtraction?
tackling the background problem
In fact, there is not the one reason as to why a confocal microscope beats out classical wide-field; it’s a little bit of everything. The resolution of a confocal microscope is certainly higher, but most importantly, optical sectioning is significantly improved. Optical sectioning is the ability to generate a clear image of the focal plane – i.e. the plane in the sample the microscope’s objective lens is focused on – by suppressing signal that comes from out-of-focus areas.
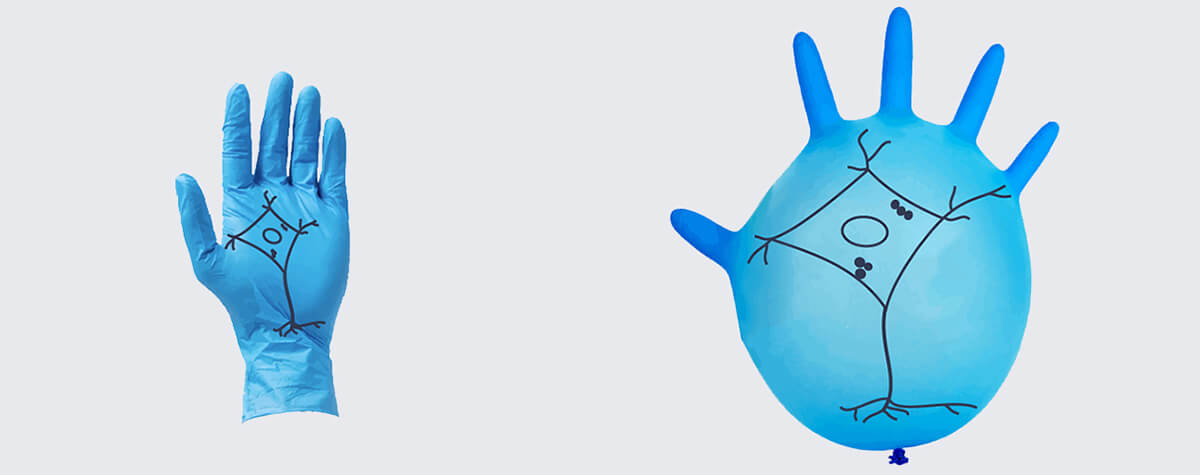
The best way to think of optical sectioning is to imagine a simple sample structure, such as two cell membranes lying on top of each other. If one membrane lies exactly in the focal plane of the microscope, we should in principle be able to observe it brightly and sharply. But what about the second one, which is out of focus? Without optical sectioning, the blurred light coming from this defocused membrane would add to the focused light of the first membrane. We would see both at the same time, unable to distinguish them. With perfect optical sectioning, in contrast, the out-of-focus membrane would be completely dark, greatly reducing the background in our image.
When it comes to light, microscopists are choosy
The optical sectioning ability of an epi-fluorescence microscope is exactly zero. This is because at all times the full thickness of the sample is both illuminated and detected. Fluorescent molecules that are not in focus will be blurred, but not dark, and therefore will always contribute in their entirety to the unwanted background signal. This effect is similar to taking photos with a camera: objects outside of the depth of focus are blurrier, but not darker.
In contrast, a confocal microscope restricts both illumination and detection to a small area. The sample is excited with a focused laser beam that has a high intensity almost only in the focal plane (we’ll get to the “almost” in a moment). Additionally, there is a pinhole in front of the detector that records the light coming back from the sample. This pinhole in turn restricts detection to almost only the focal plane. Fluorescent light that does not come from the focal plane will be defocused and not make it through the pinhole (Fig. 1). You may learn more about the differences between epi-fluorescence and confocal microscopy here.

Figure 1. Principle of optical sectioning in a confocal microscope. The excitation light (green) is focused on the focal plane. Fluorescent light (orange) returning from the focal plane is perfectly focused on the pinhole and reaches the detector. Fluorescent light from above or below the focal plane does not hit the pinhole and is blocked. In practice, however, a fraction of the background light also makes it through the pinhole, resulting in suboptimal optical sectioning.
Laterally restricting the field of view by illuminating and detecting only a small area obviously has a quite relevant disadvantage, similar to using a laser pointer to illuminate your desk instead of a lamp: only a very small spot is illuminated at a given time. If we want to see everything, we have to move this illumination – our microscope becomes a laser scanning microscope.
This is an acceptable trade-off, however, because optical sectioning is clearly better. In a confocal microscope, fluorescence quickly becomes darker with increasing distance from the focal plane, more precisely with the square of the distance: Doubling the distance of a molecule from the focal plane makes it four times dimmer. Fluorescence of a membrane that is far out of focus, for example, contributes little to the image signal and the background, which is important especially for thick samples.
The smaller the pinhole, the better this works, but at some point, it will work too good and also cut off lots of wanted light coming from the focal plane.
Light sheet and two-photon microscopy
There are other ways to create an optical section. You could optimize illumination and try to restrict it to a thin plane. That’s exactly the idea of light sheet microscopy. The only thing is that, for physical reasons, you have to come from the side to do that. As a result, specimen storage and embedding becomes more difficult, and one has to switch to low-aperture objectives. So although light sheet microscopy has its uses, it doesn’t solve all the problems.
A similar approach is taken by two-photon microscopy (or, more generally, by multi-photon microscopy), which effectively restricts excitation to the focal plane. Here, a fluorophore is excited not by one but by two photons with twice the wavelength compared to single-photon excitation. These two photons have to reach the same fluorophore at the same time to elicit fluorescence, which requires high intensities present only right in the focus. Away from the focal spot, two-photon excitation is highly unlikely and as a result, there is hardly any background signal. Two-photon microscopy thus achieves very good optical sectioning and is well suited for deep tissue imaging. However, it requires expensive lasers, does not work with all fluorophores and suffers from a comparably weak signal, low axial resolution, and slow imaging speed. Therefore, it all depends on your sample and experimental setup whether two-photon microscopy is your method of choice.
Which leaves us with confocal microscopy and its pinhole as the presumably most universal technique for optical sectioning. However, it is far from perfect as the illumination laser shines almost only in the focal plane due to its focus, but only almost. After all, the laser has to get there first, and on this way (and also on the other side after the focus) there is a non-negligible probability that molecules are excited to fluoresce and show up as background in the image. This is not a problem in thin samples like stained membranes, but in thick samples such as deep tissue this dimming is not enough when there are easily tens of thousands of molecules in the background. And some of the background fluorescence will always pass the pinhole and reach the detector.
We can do better, can’t we? Yes, we can!
Welcome to the MATRIX
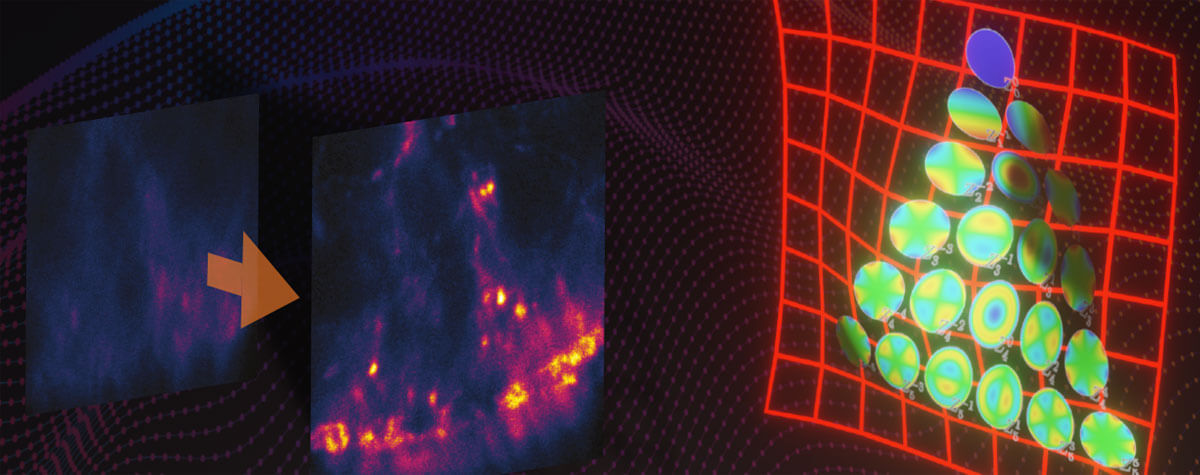
Array detectors like the MATRIX consist of more than 20 individual detector elements arranged side by side. They “look” at the sample from many point of views and therefore record in-focus and out-of-focus light separately. This way, the background contribution is measured for every pixel of the image and is removed from the total signal (Fig. 2). The result is greatly improved optical sectioning.
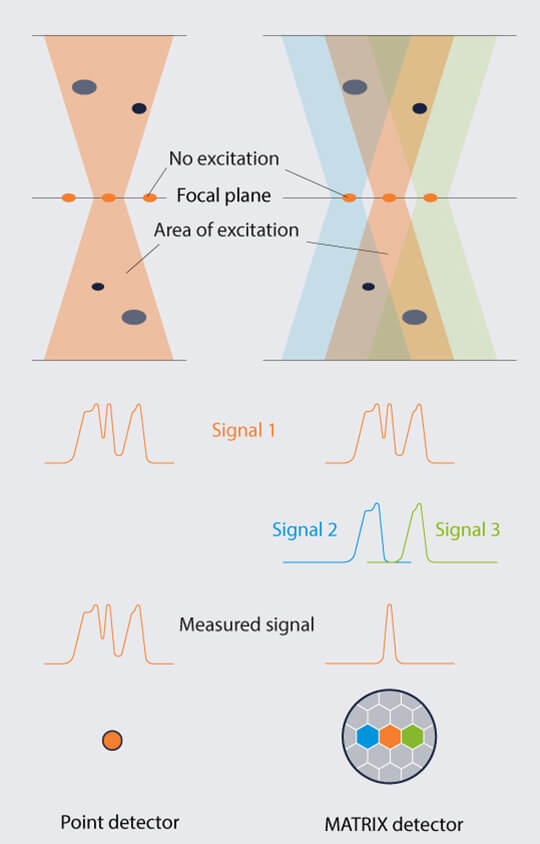
Figure 2. Optical sectioning by laser focusing and pinhole is not perfect, and some stray light always reaches the detector. An array detector like the MATRIX consists of many individual detector elements that “see” the sample from slightly different angles. It can therefore discriminate between light coming directly from the focal plane and light coming from defocused areas, allowing superior background removal.
The step from confocal to MATRIX is as big as the one from wide-field to confocal. We remember that in a wide-field microscope, no sectioning is possible at all, so all molecules shine with the same brightness, no matter what distance they are from the focus. In a confocal microscope the signal decreases quadratically with the distance to the focal plane. With a MATRIX detector, it does so with the 4th power. Structures that are 10 times further away from the focus are therefore not 100 times dimmer, but a whopping 10,000 times.
Optical sectioning becomes possible by laser beam and pinhole joining forces. But only array detection will bring it to perfection.