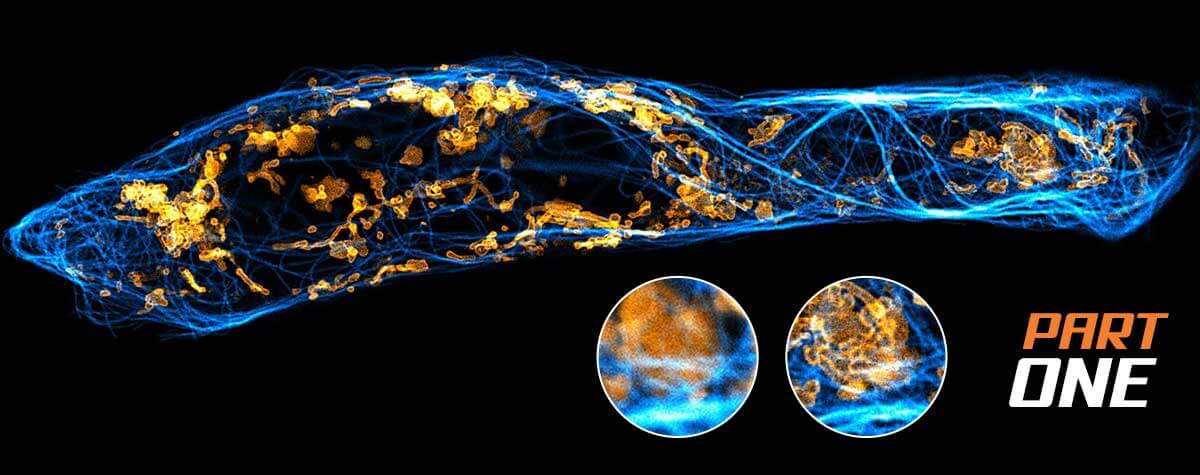


Deep and clear:
So much of the microscopic world rides on structure. Seeing and measuring shape, size, spatial relations, and movement at the smallest of scales is commonplace in research. But good measurements require good images and out-of-focus light is an ever-pesky problem. Confocal microscopes were designed to get rid of that background. How do they work? And when do you know it’s time to use one? The answer is in the pinhole (oh, and in this article).
where confocal beats out wide-field
Microscopy methods and microscope types abound for a broad range of applications. Among them, confocal microscopes have become a staple of biological imaging. First commercialized in the mid-1980s, confocal microscopes offered higher resolution and more sensitive detection than epifluorescence wide-field microscopes. They also generated clearer images. Instruments were subsequently outfitted with z-stacking, and today’s confocal microscopes reconstruct three-dimensional renditions of optically sectioned specimens. State-of-the-art stimulated emission depletion (STED) microscopes equipped with MATRIX array detection will even yield superresolved images of living specimen with exceptional signal-to-background ratio and clarity.
Building a 3D image, one slice at a time
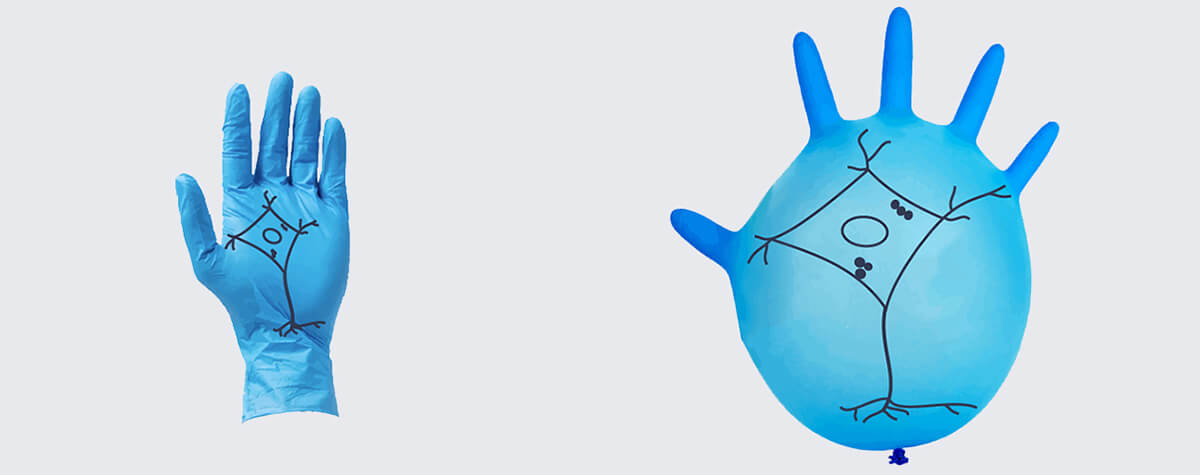
Optical sectioning is the process of imaging the x-y plane of a sample in the focal plane of a microscope’s objective and successively moving along the z-axis to generate a series of images spanning the depth of the sample. Overlay these images correctly, and you can build a 3D map of your sample, much like stacking the slices of an orange to reconstruct the complete fruit. The value of this process is realized only if each section includes information exclusively from molecules present in its specific focal plane. Any out-of-focus light from above or below the plane obstructs the clarity of the reconstruction and confounds any quantification of fluorescence intensity. This is precisely where an epifluorescence wide-field microscope falls short.
From floodlight to pinpoint
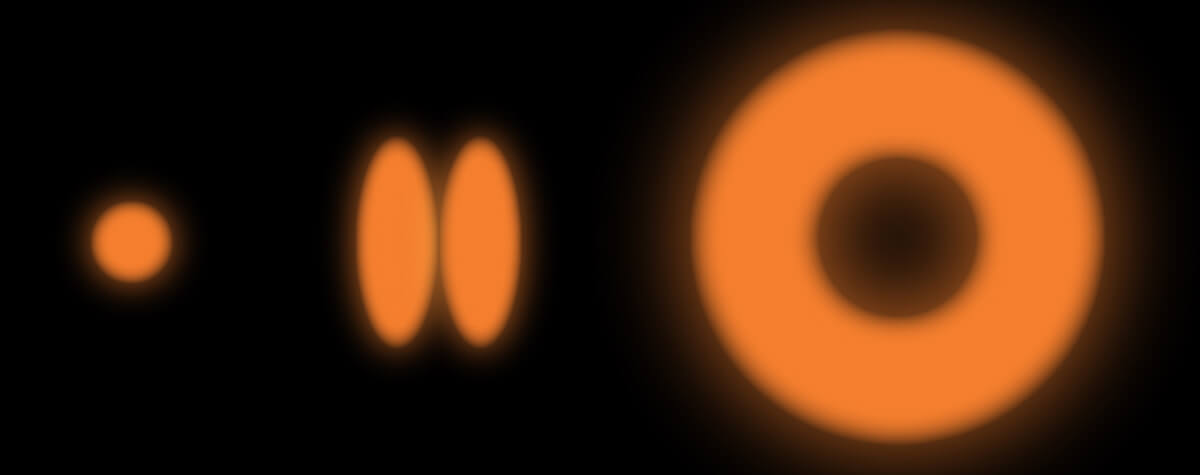
An epifluorescence wide-field microscope illuminates and detects the entire thickness of a sample. You inundate the specimen with excitation light, and fluorophores everywhere shine right back. Those fluorophores in the objective’s focal plane will appear as clear, strong signals. However, the camera will also capture light from molecules above and below the plane. These will appear as a haze that muddles the objects of interest. Generally, the haze is a minor nuisance when working with thin or sparse specimens at low magnification. Wide-field microscopy quickly captures very good images. As samples get thicker, however, out-of-focus light becomes increasingly problematic, especially at higher magnifications.
The laser of a confocal microscope illuminates only a small area at the focal plane in the sample. Fluorophores in and out of the focal plane become excited, and the emitted light of the latter is blurred, as in a wide-field microscope. The difference here is that a confocal microscope includes a pinhole positioned before the detector (Fig. 1). Emitted light from molecules on and close to the focal plane of the objective passes through the pinhole to the detector. Much of the out-of-focus light is blocked. Because of the pinhole, the light emitted by fluorophores outside of the focal plane contributes significantly less to the image and background, creating clearer images. The smaller the pinhole, the better out-of-focus light is blocked, but the more wanted signal is lost.
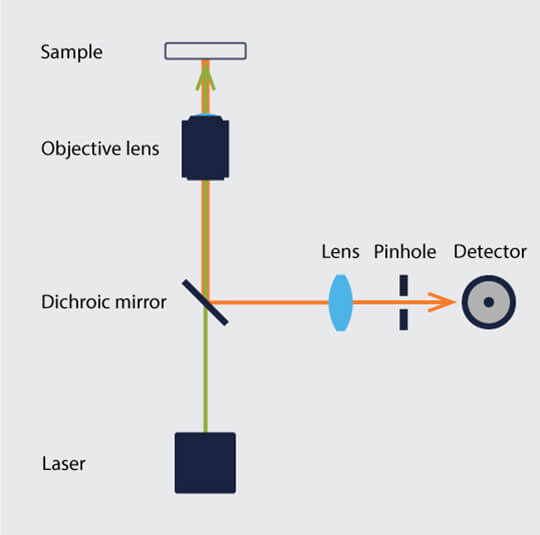
Figure 1. Simplified schematic of a confocal microscope setup.
To scan or spin. That is the question.
So far, though, we have only recorded information from a small spot of the sample. You have two options to capture a complete image. One option is to use a laser scanning confocal microscope (LSCM), which creates a complete image by making a series of recordings along a raster that covers the field of view in a sample. The detector is often a single detector, such as a photomultiplier tube, an avalanche photodiode or similar, that quickly amplifies the low light captured from a spot. Because the location of detected light is encoded in the raster, a camera detector is unnecessary. An LSCM produces high-quality, in-focus 3D images of thick samples, but it takes time to build optical sections of a sample spot-by-spot and then stack these into a 3D rendition.
A spinning disk confocal microscope (SDCM) is a more time-efficient alternative. An SDCM replaces the single pinhole on the detection path of an LSCM with hundreds of pinholes arranged in spirals on a disk. With each disk rotation, the pinholes sweep across the field of view, allowing light from multiple unique spots on the sample through to a high-efficiency CCD. This accelerates signal acquisition compared to an LSCM.
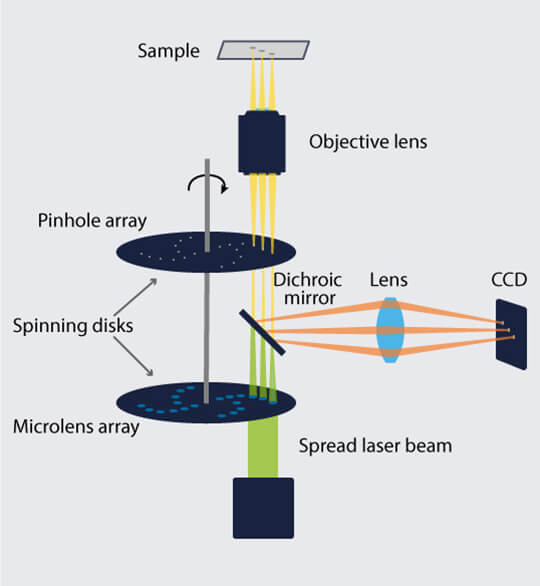
Figure 2. Two matched disks rotate in a spinning disk confocal microscope, allowing excitation light through to a restricted number of spots on a specimen and emission light back from those spots to an efficient CCD.
The higher number of pinholes of an SDCM is also its limitation, however. In thicker samples, there is a point where out-of-focus light overlaps with adjacent pinholes on the disk. That light will reach the detector and muddle up your image.
Through thick and thin. Just with the right microscope.
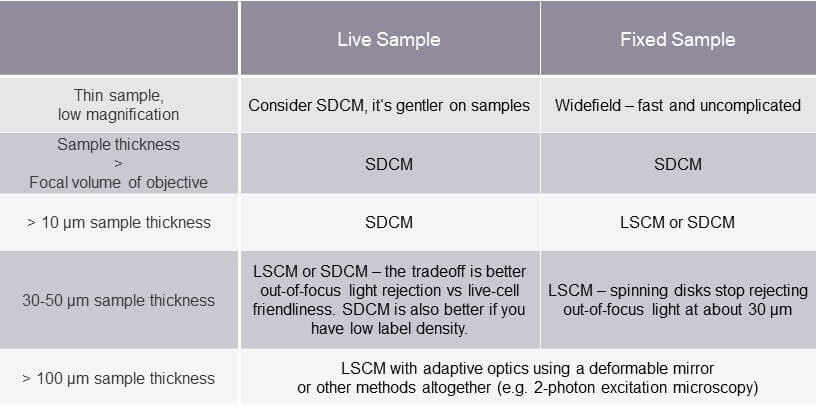
So, is there a rule of thumb in choosing a suitable microscope? The following table can help.
To image clarity and beyond
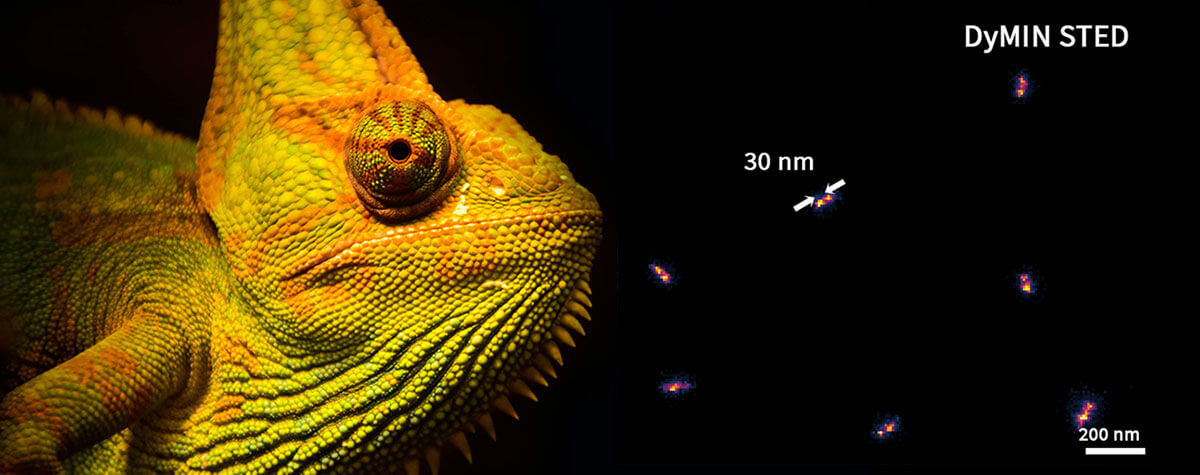
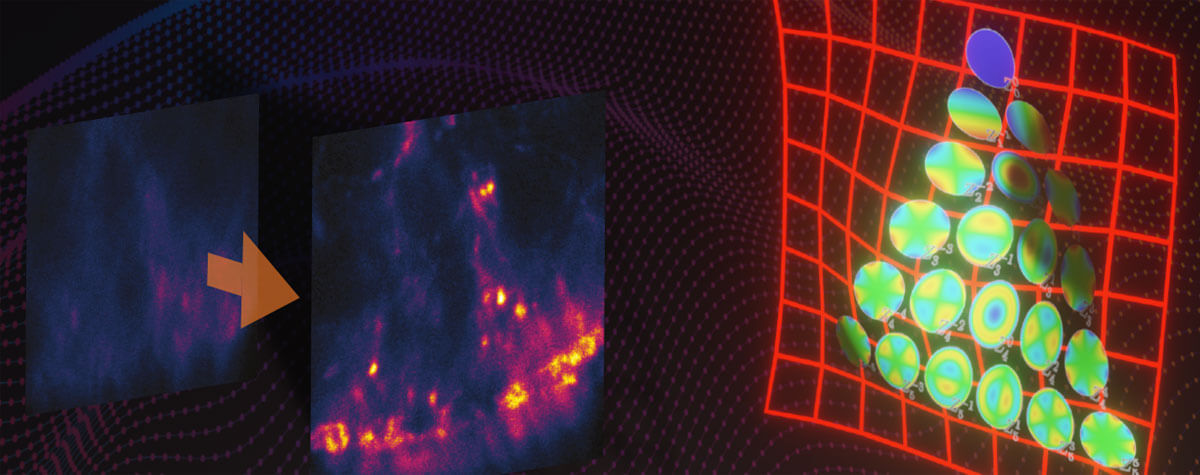
Confocal microscopy isn’t the be-all and end-all of clear optical sectioning and 3D imaging. A significant improvement on the confocal strategy of “block out-of-focus light” is “record and subtract out-of-focus light.” That’s possible by changing the way that emission light is detected. The MATRIX detector is an array of photodiodes that record light emitted by fluorophores in a sample from different angles. Integrating these perspectives allows MATRIX to record the background separately from the in-focus signal. That information is then easily subtracted for a clear, in-focus image. Add the MATRIX detector to a STED microscope, and you get exceptional clarity, superresolution, and live-cell imaging in one. The what and why of confocal versus STED microscopy will be the topic of another article.