

What’s inside
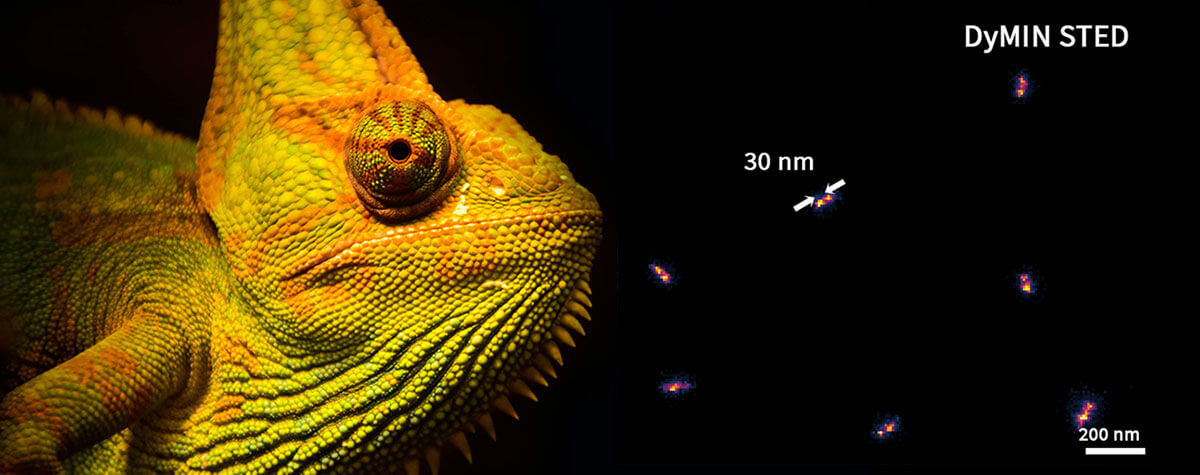
STED microscopy reaches a resolution about ten times higher than the diffraction limit. What has to be inside a microscope that can do this? How does its hardware differ from a confocal setup? (Hint: Not very much.) And what does that mean for the user? (Many good things.) Is handling a STED system any more complicated than using a confocal? (Not really.) Important questions – here are some in-depth answers.
a STED microscope
In spite of the revolutionary increase in resolution, the setup of a microscope capable of stimulated emission depletion – better known as STED – doesn’t overthrow the well-established design of a confocal system. In fact, the general principle of how a STED microscope elicits fluorescence in the sample, filters out-of-focus light, and generates an image based on the detected signal is identical. But state-of-the-art STED is more than topping off a confocal with some additional components – it also places special demands on design and optical quality.
A brief recap
What’s in a confocal? We have at least one laser (usually more) that generates a light beam which is focused on the specimen by means of an objective lens. A scan unit moves this focal spot over the sample, line by line. Fluorescence emitted by the sample is collected by the objective lens and sent to a detector. The detector is located behind a pinhole whose function is to provide optical sectioning. In between are dichroic mirrors separating incoming from outgoing light and guiding the way.
Note that this is the very basic setup. There are countless variations of a confocal microscope on the market which all deviate from what is described here in one way or another.
And now the STED part
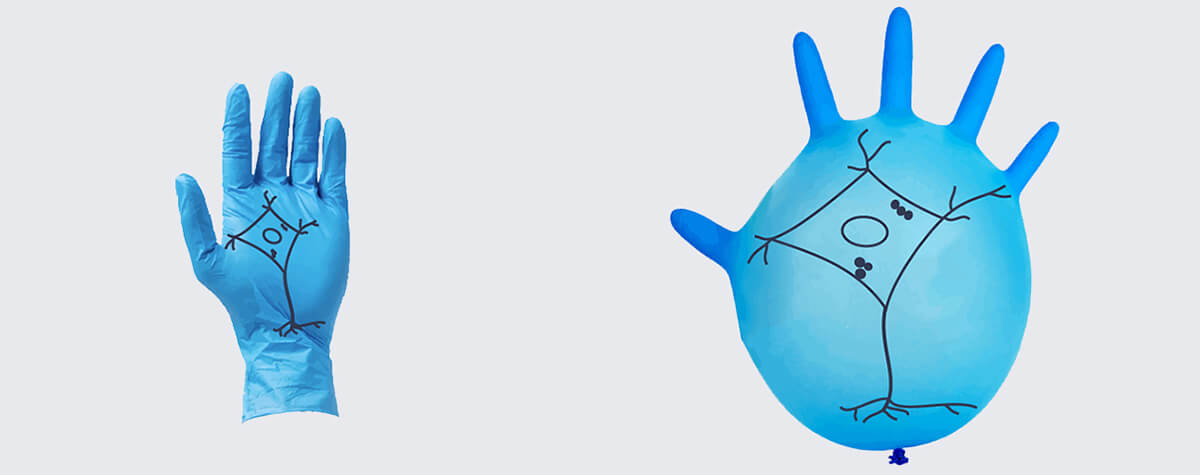
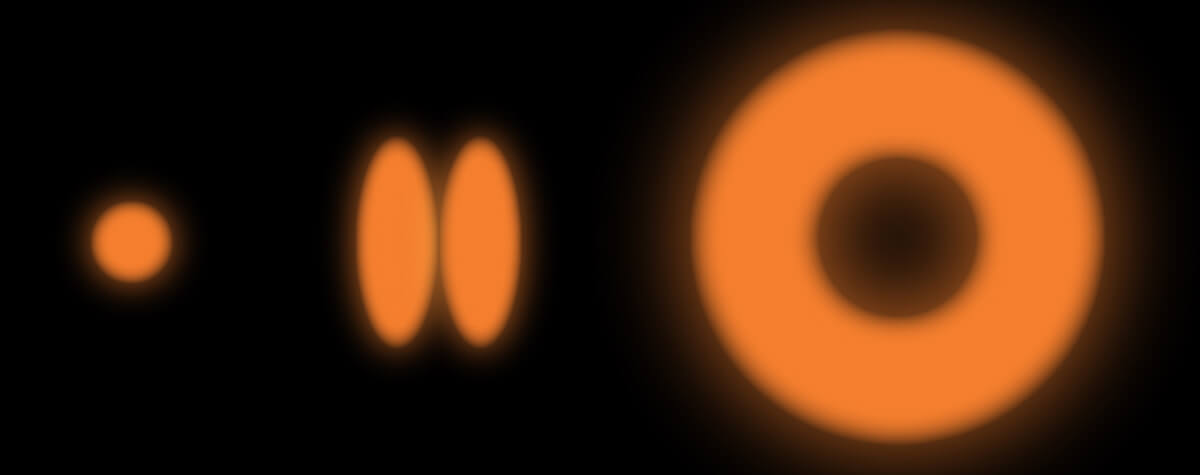
All the elements listed above can be found in a STED microscope, as well, with the very same function and essentially the same arrangement. But there is something on top, something that changes the outcome from diffraction-limited to superresolved. Most importantly, we have at least one additional laser source generating the STED beam. This beam passes a device that turns it into a donut with a central intensity-zero. Then it is coupled into the main light path by another dichroic mirror.
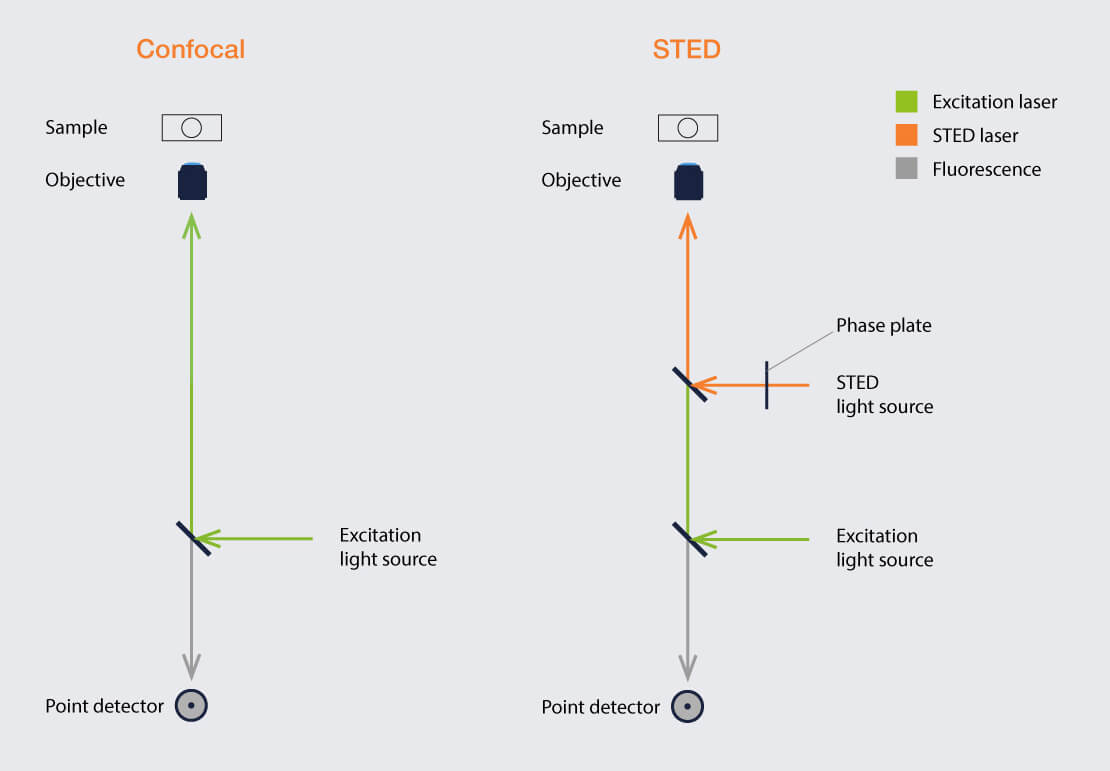
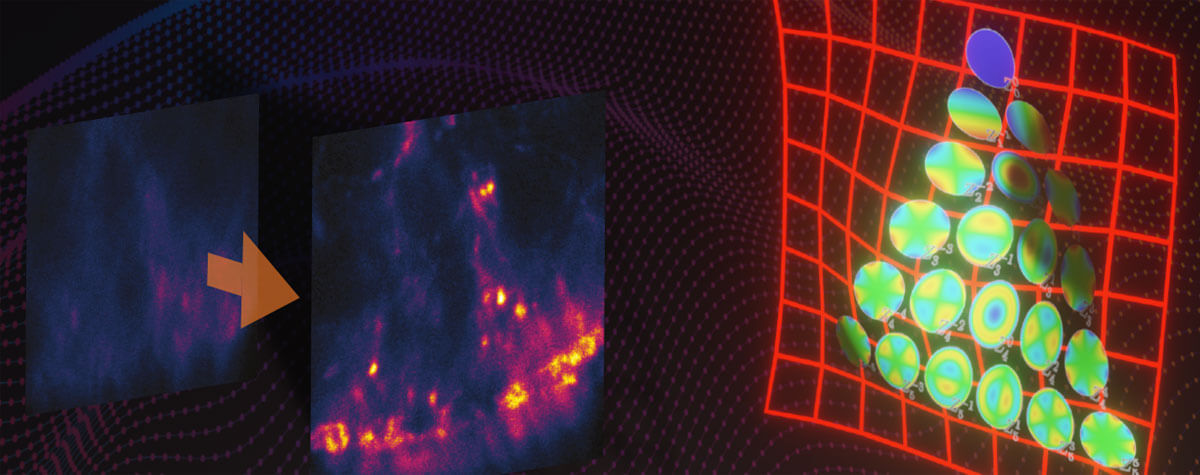
Basic setups for confocal and STED microscopy. The most important addition for STED are the STED laser and its beam shaper. However, integrating these components into the overall design poses particular challenges.
Let’s take a closer look at those components transforming a conventional confocal microscope into a superresolving STED machine.
The laser providing the STED beam is red-shifted relative to the excitation lasers and should be pulsed to reduce the light burden on the sample.
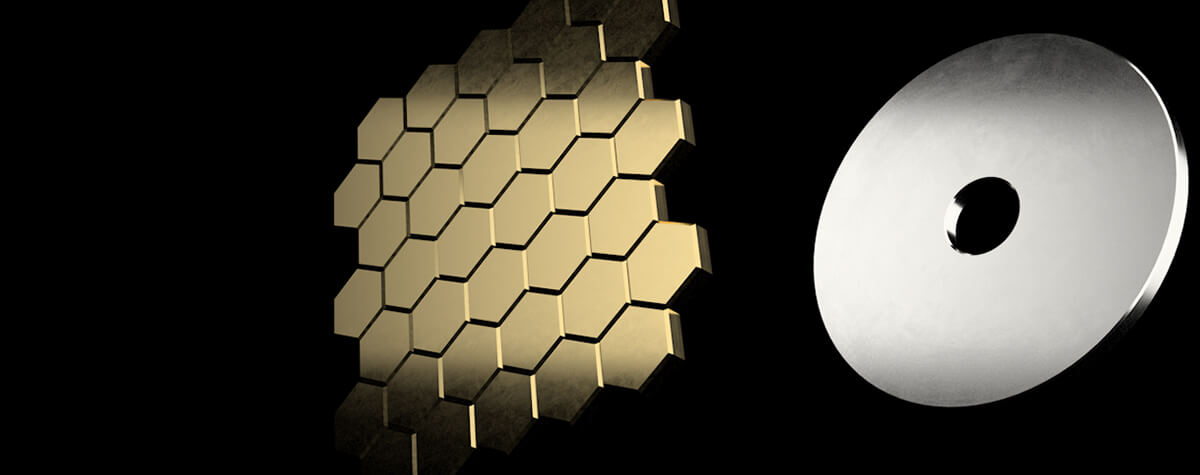
On its way, the shape of the STED beam has to be transformed into a light distribution with an intensity zero surrounded by light. In the most basic setup, a phase plate takes care of this. This device delays portions of the beam slightly (by half a wavelength) such that rays interfere destructively in the focus instead of constructively, as is the normal case. Destructive interference in the focus results in an intensity zero surrounded by intensity maxima: the well-known donut shape. 3D STED requires a different phase plate. And being able to mix both 2D and 3D STED at an arbitrary ratio results in a slightly more complex setup with a beam-splitter and two phase plates, one for 3D and one for 2D STED. In more sophisticated STED systems like abberior’s MIRAVA POLYSCLOPE, this arrangement is replaced by a sequential spatial light modulator (SLM). This avoids having to split up the beam, something that can cause serious misalignment.
Not all STED is the same
In terms of essential components needed to move from confocal to STED, this is already it. But we haven’t put all the pieces fully together yet. For integrating the additional elements and functionalities into a microscope is accompanied by some challenges. After all, the goal is to acquire images with a resolution of a few ten nanometers – the demands on optical precision and mechanical stability (think drift and vibrations) are correspondingly higher. And this is where the wheat is separated from the chaff: only STED systems that meet these demands can fully exploit the potential gain in resolution and produce high-quality superresolution images.
Firstly, the STED beam has to be aligned with the excitation beam(s). Here, perfectionism is key: only when the STED and excitation beams are exactly on top of each other and remain there over time fluorophores can be efficiently de-excited. Any deviation results in a loss of resolution and signal.
abberior takes care of this with its Full Autoalignment, the first complete, fully automated alignment procedure for all beam paths that also includes the pinhole and STED beam shaping. The STEDYCON solves the issue its own way: it is fully aligned by design by coupling all lasers into a single optical fiber.
Then there is the fact that STED imaging gets rid of all the low-resolution photons. Consequently, detected signal levels are somewhat lower, while the background is not, because it is unaffected by the STED beam. abberior addresses this problem with a special detector. The MATRIX array detector measures in-focus and out-of-focus signal separately, facilitating a superior signal-to-background ratio and making the pinhole obsolete Dive deeper into the MATRIX here.
Another element demanding special attention in a STED setup is the scanner. abberior optimized its QUAD scanner for optical quality and the particular requirements of STED imaging. It works without a scan lens, reducing optical losses, and allows arbitrary scanfield rotation even for STED (which is something other scanners aren’t capable of).
Awesome STED is awesome confocal
Dedicated STED microscopes are not confocal microscopes with a retrofitted STED option. They were designed from scratch targeting the highest optical and optomechanical demands. It becomes clear that this also lifts confocal imaging to another level: an excellent STED system has so many excellent components that it is an excellent confocal system, too.
The user perspective
So, in summary, it takes essentially two things to turn a confocal microscope into a STED system: firstly, couple a donut-shaped laser beam into the beam path, and secondly, trim the individual components for best optical quality.
What remains is the question what all this means for you, the microscopist. Is operating a STED microscope any more complicated than using a confocal system?
Not at all! In fact, modern software – the STEDYCON smart control and the LiGHTBOX are exceptionally easy to use. Their internal logic reflects decades of STED experience in a condensed form to provide the user with suitable default settings for each scenario. With this, getting a good STED image is just three clicks. And it’s not all or nothing, either: you can seamlessly adjust resolution between confocal to STED simply by moving a single slider, giving you the best of all worlds, from pure confocal to high-end super resolution. You’re not missing out on the simple things, just because you can also do STED!
Ok, you may say, convinced: STED isn’t complicated, neither in theory nor in practice. But the sample preparation! Surely, I will need to establish a whole new protocol, right?
Again: no. There are some adjustments advisable, but generally the protocol hardly differs from established confocal sample prep.
So, hand to heart: is there any rational reason why you shouldn’t give STED a try?