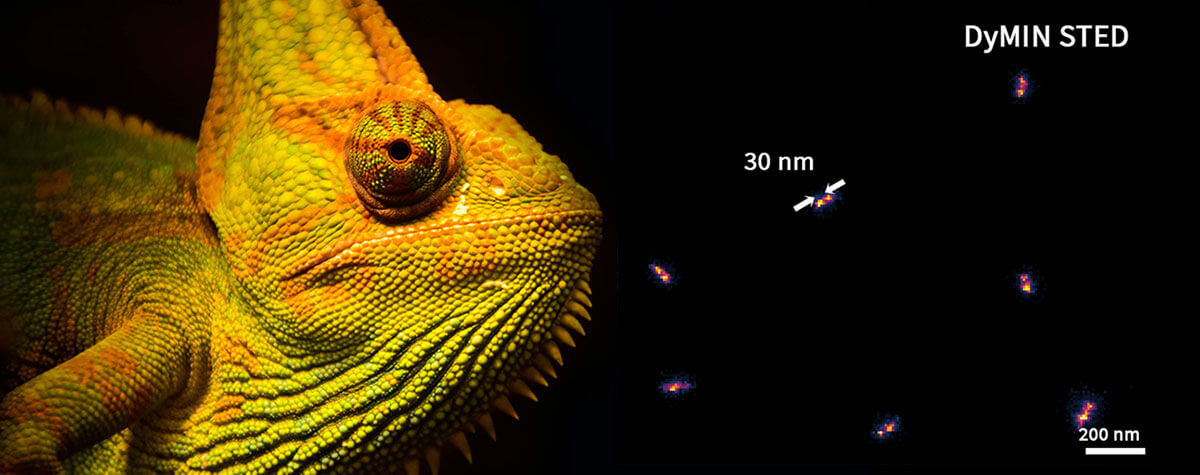


How to make a STED donut
The donut-shaped de-excitation beam is one of the most important practical ingredients for superresolution STED microscopy. But how do you put a hole into a beam of light? Surprisingly, it’s not that difficult if you know how to do it, but it’s very difficult to get it right in practice.
the (w)hole story
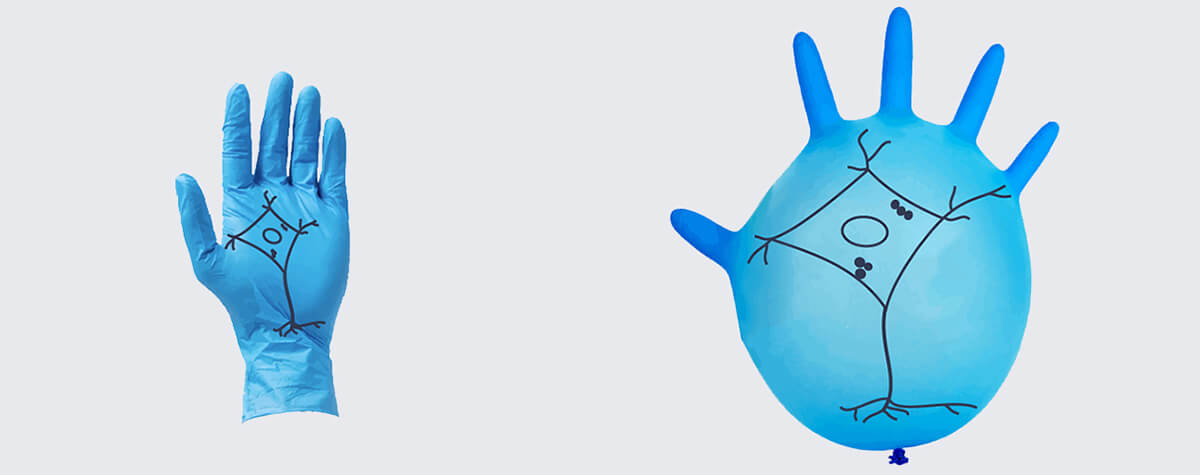
Superresolution with stimulated emission depletion (STED) microscopy – also called STED nanoscopy – relies on transiently silencing fluorophores in the outer regions of the excitation spot, thereby shrinking the zone from which molecules are allowed to fluoresce to sub-diffraction dimensions (more on how STED works here). In this scheme, the STED beam acts as the light switch. To do its job, it has to have a specific shape: zero intensity in the center surrounded by high intensity light all around – yes, it’s a yummy donut!
Making a real sweet donut in the kitchen is simple (provided you have a good recipe), you simply need the right baking sheet whose cavities define the donut’s shape. But how do you tell a light beam to become a donut? Obviously, there is no shaping pan for a light beam. Or is there?
Of peaks and valleys
Before we answer this question, we need to take a step back and remind ourselves of the physical properties of light. As you know, light propagates as a wave, and like any wave its properties can be described by its wavelength or frequency, amplitude, direction, and phase. We will focus on the phase here. The phase describes when and where a wave reaches a certain state (e.g., peak or valley). The phase can be measured by fractions of the wavelength λ.
When two waves meet, the difference between the waves’ phases determines the amplitude of the resulting new wave. If for example two interfering waves are completely in phase – meaning that their peaks and valleys align perfectly – their amplitudes add up in constructive interference. If, in contrast, one of the waves is shifted by half a wavelength (λ/2), peaks and valleys cancel each other out, and interference is destructive. In the special case of two waves with precisely the same amplitude, destructive interference is complete: no light, zero intensity.
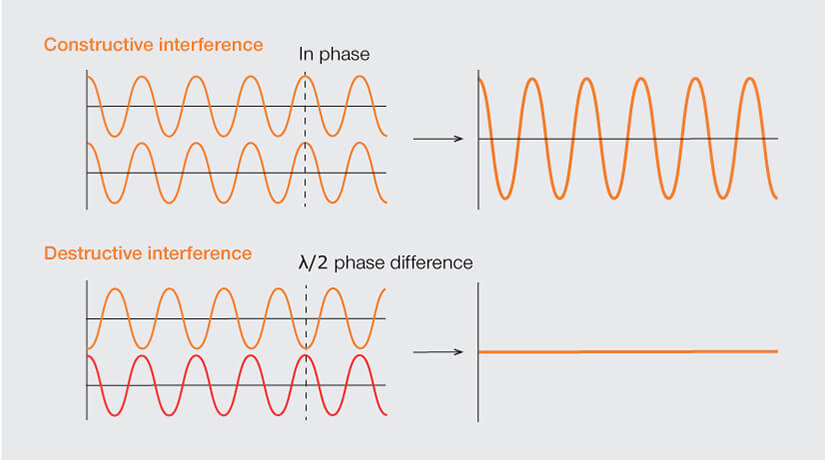
When waves are in phase (peak meets peak and valley meets valley) they add up in constructive interference. Waves of identical frequency and amplitude but with a phase difference of precisely half a wavelength (peaks meets valley and vice versa; λ/2) interact destructively and cancel each other out.
By now you probably have guessed where we are headed.
Creating a donut-shaped STED beam is all about cleverly manipulating the beam’s phase to achieve complete destructive interference when the light waves meet in the focus.
A convenient way to change a beam’s phase is by placing a phase plate in its path, a device that retards waves passing through. In its simplest form, this can be a flat piece of glass that takes longer for the light wave to pass than a slab of air with the same thickness.
So with a phase plate we have the means to change the phase of the STED beam. But does that turn our beam into a donut? Not quite. After all, we have to create a phase difference to produce destructive interference. Uniformly shifting the phase of a beam doesn’t do the job.
So we obviously need to change the phase not of the entire wavefront but only of parts of it. The easiest way to achieve this is by using a phase plate that only covers half of the beam. By choosing just the right glass thickness, we can thus introduce a phase difference of exactly half a wavelength between opposite sides of the beam. When the waves from both sides meet in the focal plane, this results in complete destructive interference on a line parallel to the edge of the phase plate. But wait, we need a donut, not a hot dog bun, don’t we…?
Towards the donut
To move from line to donut, the best option is a vortex phase plate. Essentially, this is a rotationally symmetric version of the hotdog bun phase plate. It’s a miniature spiral staircase with helically increasing thickness that introduces a spiral phase shift between 0 and a full wavelength over the wavefront. Any two waves on opposite sides of the beam get a mutual offset of precisely half a wavelength and cancel each other out in the focus. And eventually we have a perfect STED donut…
… but only in 2D. Resolution along the optical axis still is diffraction-limited in this setting as the donut only extends laterally in the focal plane.
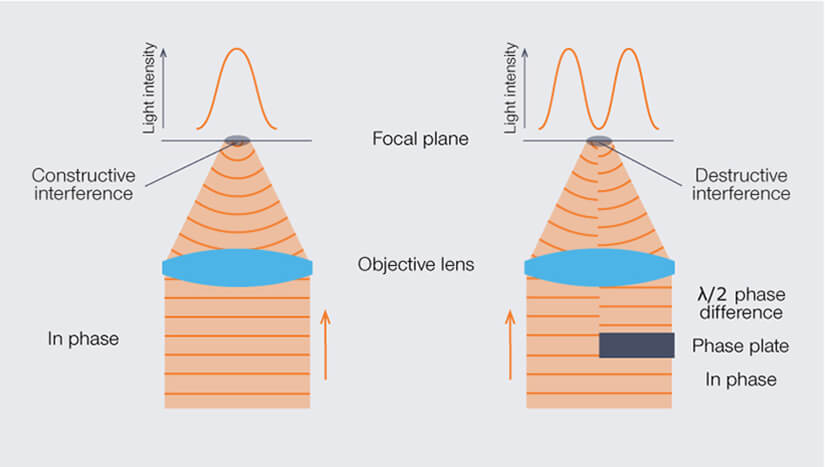
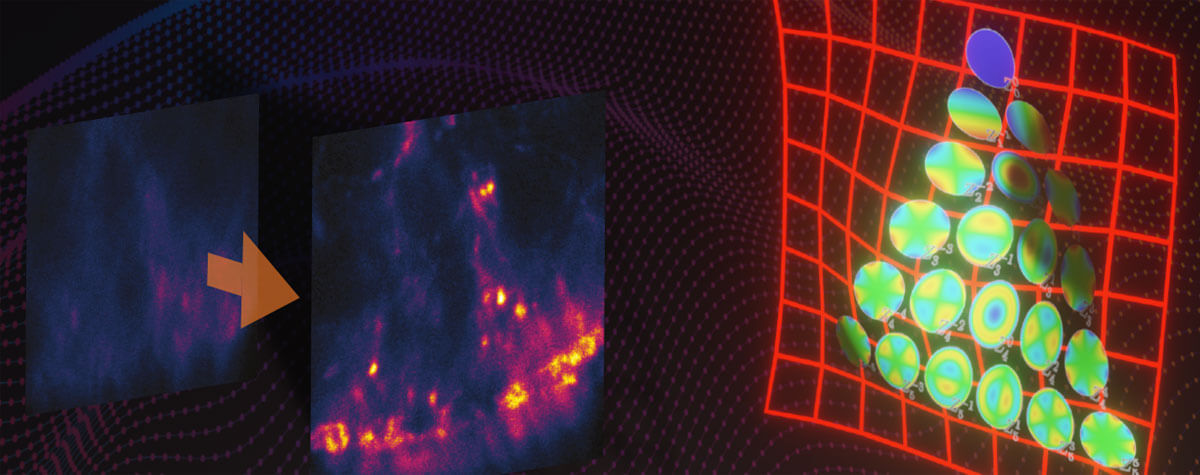
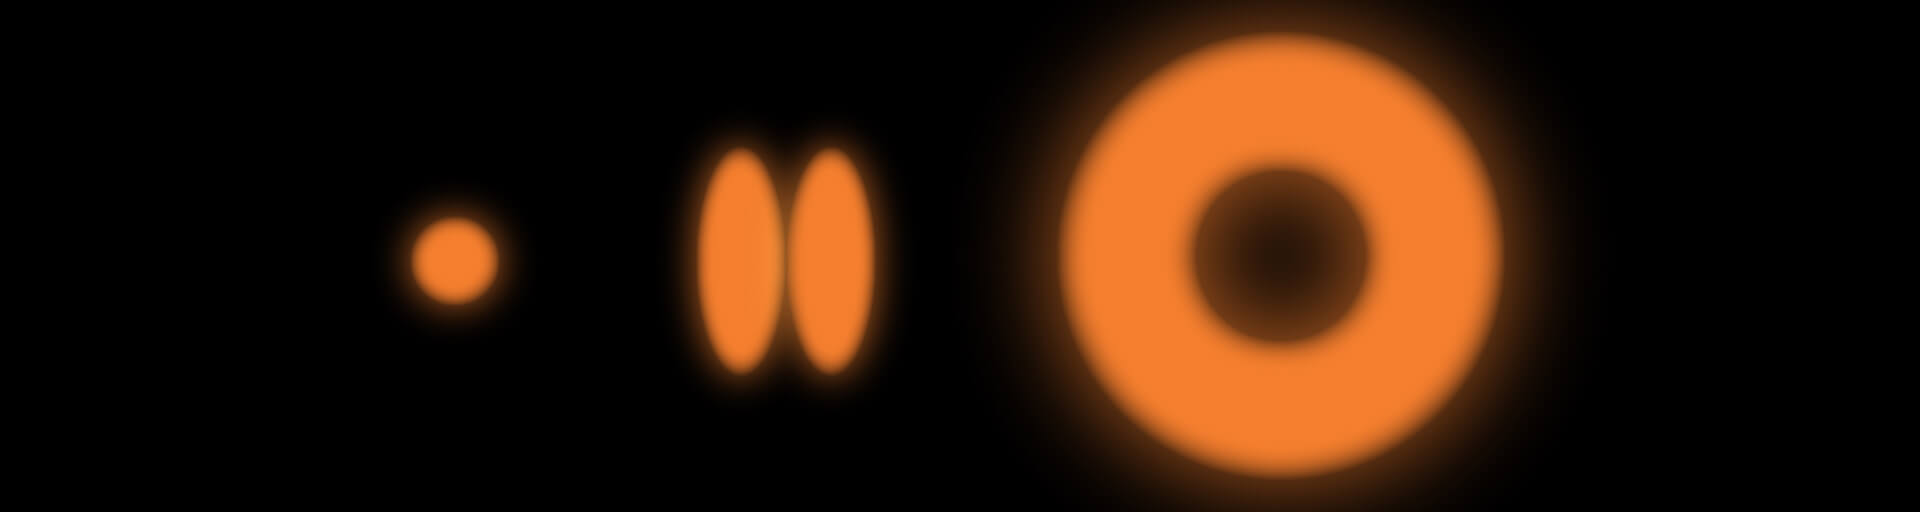
Effect of a phase shift on the light intensity in the focal spot: when all waves are in phase, they interfere constructively in the focus (left). A phase plate covering just one half of the beam results in a central line of destructive interference in the focal spot if its thickness retards the wavefront by exactly half a wavelength (right).
Superresolving z
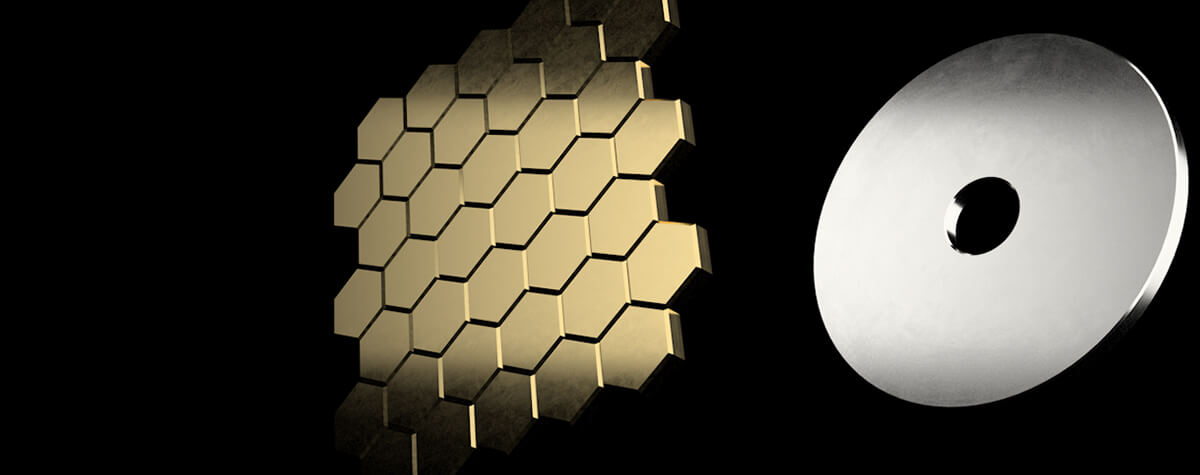
Luckily there are more options of how to construct a phase plate to manipulate a light beam. For 3D STED, the plate takes an annular shape, with the outer ring being thicker than the central disk, introducing a phase shift of precisely half a wave between them. Waves going through the two different parts of the annular phase plate thus focus to two different, but perfectly aligned point spread functions (PSF) in the focal plane (what’s a PSF?): a larger one resulting from the light passing the inner disc, and a smaller one generated by the light passing the outer ring. Due to the phase shift between the two, the smaller PSF essentially stamps a hole into the larger one.
And so, we finally get a three-dimensional STED donut – which rather is a hollow sphere of light with a central intensity zero – that shrinks the effective excitation spot to sub-diffraction extent in all three dimensions. 3D STED achieved! And all microscopists can live happily ever after – a fairy tale would end here.
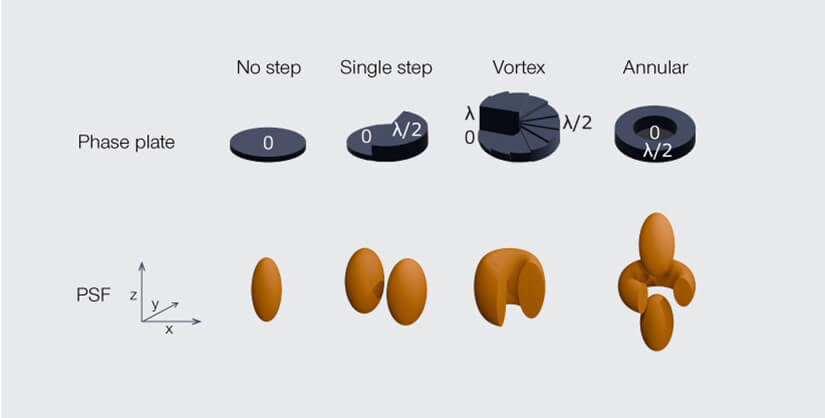
Different phase plates, different outcomes: While a single step phase results in a central line of destructive interference in the focal plane, a vortex phase plate generates a donut. 3D STED is achieved by using an annular phase plate that introduces a phase difference between the outer waves of the STED beam and the inner waves. Due to their higher numerical aperture, the outer waves generate a small PSF that is located in the center of the large PSF resulting from the inner waves. Where both PSFs overlap, the waves cancel each other out due to their phase difference. The result is a 3D donut.
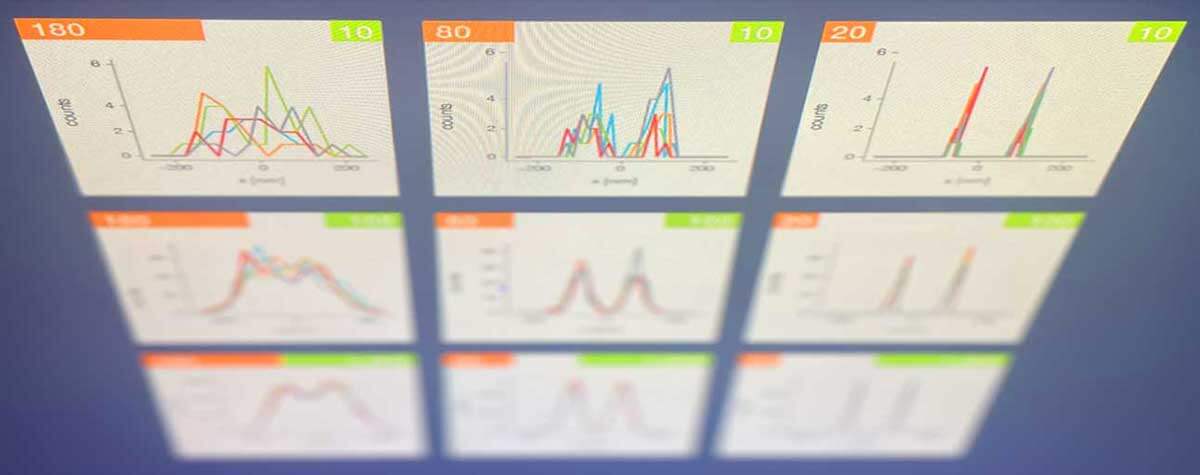
To be continued
But reality doesn’t. For one, obtaining isotropic resolution in all three dimensions with a phase plate setup remains a challenge. Then there are aberrations that give the 3D donut a hard time as they quickly fill the donut center with STED light, eating up fluorescence signal. And phase plates are not adjustable to the varying back apertures of different objective lenses.
You see, our story demands to be continued. Watch out for the sequel, in which you will learn about a different way to make a STED donut and how this solves several problems at once.